Gamers spend numerous hours behind gaming consoles and computers, striving to achieve outstanding results. However, this is often hindered by the lack of suitable furniture that could provide comfort and support during extended sessions.
In this article, we will discuss how to assemble a gaming chair – an essential accessory for every gamer and avoid common mistakes.
Contents
Preparation for Assembly
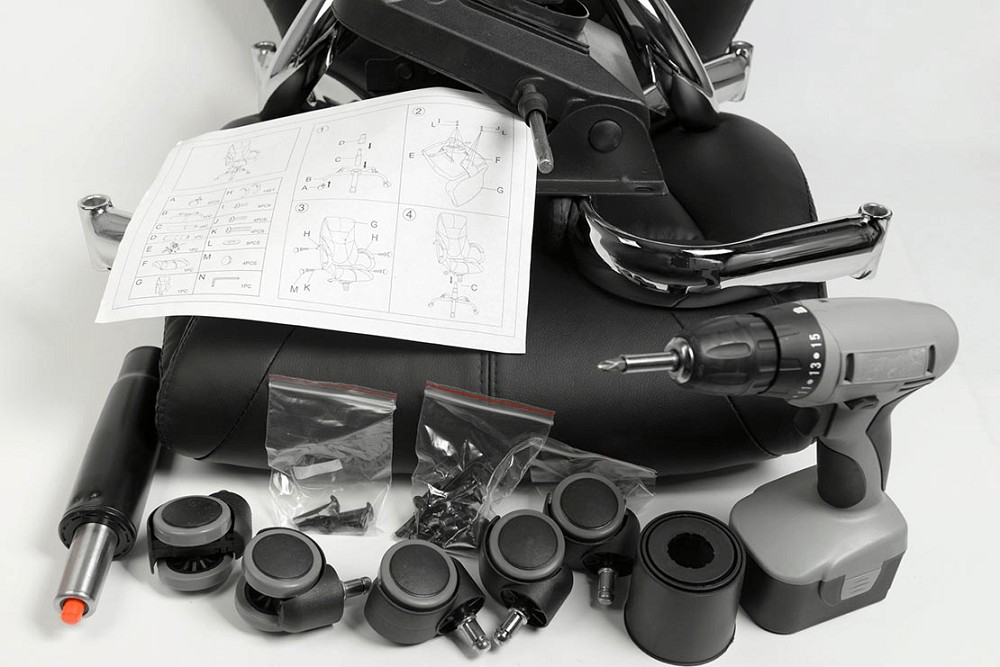
Before you begin the assembly process, it’s important to ensure that everything is present in the packaging. A typical kit includes:
- Wheels – their quantity varies depending on the chair’s model.
- Base with covers.
- Lift mechanism and its cover.
- Seat and backrest (either separate or integrated), along with 2 armrests.
- Set of bolts and other fastening elements.
- Specialized wrench, in case some fasteners have internal hexagonal openings.
Carefully inspect the components. They should be undamaged, free from scratches, and wear marks. If everything looks good, you can proceed with the assembly procedure.
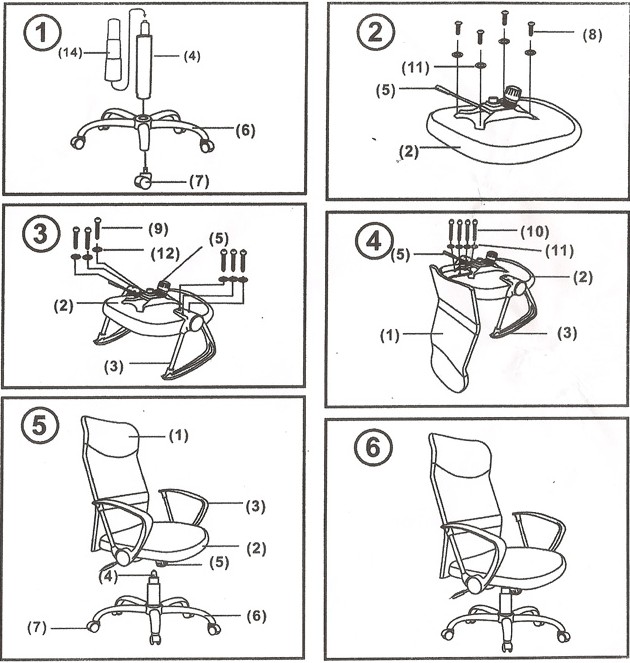
How To Assemble A Gaming Chair: Assembly Steps and Diagram
To ensure the chair’s longevity and prevent any mishaps, it’s crucial to follow the assembly process step by step as outlined in the assembly manual. An additional helpful resource is the assembly diagram. With a minimal set of tools and basic practical experience in their use, you’ll be well-equipped to carry out all the necessary operations on your own.
Read also How Many Cores for Gaming in the article https://gamingbeststuff.com/how-many-cores-for-gaming/
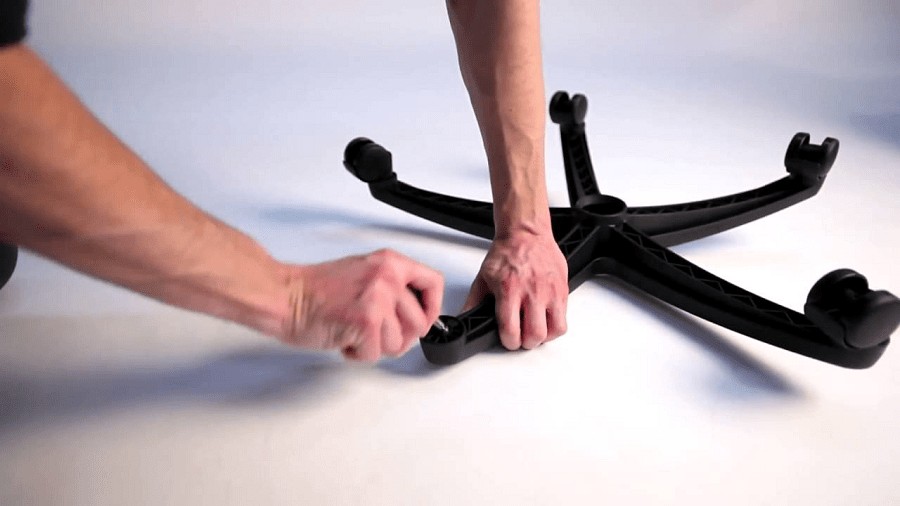
Installing Casters into the Base
It’s advisable to begin assembling the chair by installing the casters into the base. Placing them into the sockets of the base is a straightforward process.
For ease, it’s recommended to place the base on a flat, solid surface, such as the floor or a table, with the holes facing upward.
Inserting the casters into the sockets is a simple task: the stem of each wheel is fitted into the hole on the base and pushed in until it clicks into place. The remaining components are installed in the same manner. Avoid forcefully hammering the casters, as they are entirely made of plastic and can be damaged. If you find that your hand strength isn’t sufficient, you can gently use a rubber mallet, but exercise caution.
After mounting the casters, flip the base over, place it on the floor, and apply pressure to each protrusion to ensure that the parts are securely in place and have taken a stable position.
Preparation and Seat Installation
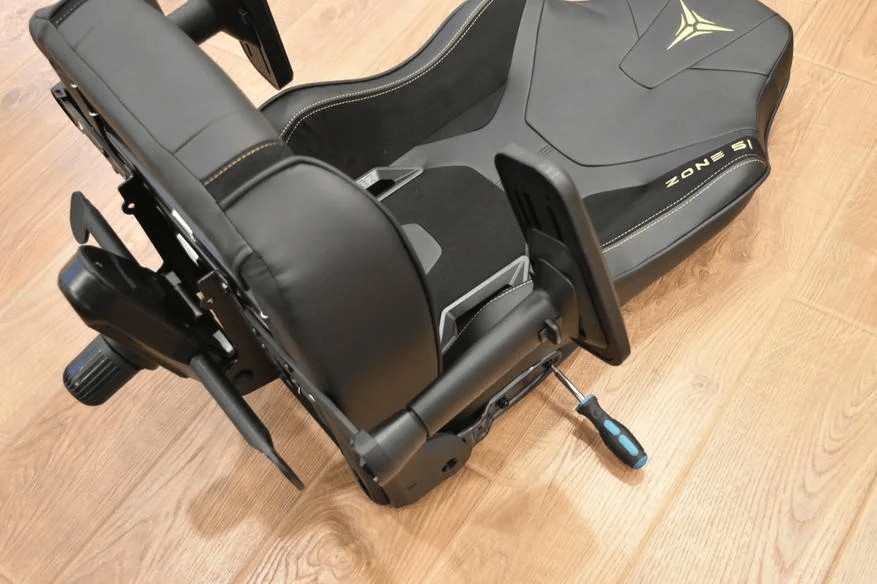
Begin by turning the seat upside down and installing the adjustment mechanism. It might have varying designs, but typically includes an adjustment screw, attachment for the gas lift (gas spring), and a lever for adjusting seat height. First, place the component and ensure that all the holes for the fasteners align perfectly.
It’s crucial to correctly position the adjustment assembly to avoid confusing the sides for attaching the gas spring and the adjustment screw. Then proceed with the installation, placing two washers under each screw – a larger one to increase the contact area and a smaller one as a lock to prevent screws from loosening during use.
Attach the armrests. This step is relatively straightforward: position the part at the fixation point and secure it with screws. The key is to ensure you don’t confuse the sides and install the armrests correctly.
Finally, install the backrest. To do this, the console support piece (bracket) is placed in its designated spot, followed by the screws with washers, which are then firmly tightened.
Gas Spring Installation into the Base
Before installing the gas spring, remove the protective caps from its ends to ensure the proper functionality of the shock absorber. Following this, insert the lower part of the gas spring into the central hole of the base, pressing down to secure it in the desired position. Place the cover over the top of the gas spring and fasten it using the latch on the base housing.
The telescopic-type cover serves as a safety measure, preventing the seated person from falling if the lifting mechanism malfunctions. Additionally, it serves a decorative purpose by concealing the gas lift. The cover is assembled in a telescopic manner, with one part inserted into another and secured by protrusions in the base body. When the supporting base is ready for seat attachment, you can proceed to the final stage.
Assembling the Chair Components
Extreme care is needed when attaching the assembled seat to the supporting base. Our main goal is to gently place this component onto the lifting mechanism.
Carefully place the upper part of the chair onto the gas lift shaft. There is nothing complex here; the key is to align the shaft precisely with the hole to avoid damaging the parts of the structure.
Next, apply significant pressure to the seat, or even better, sit on it. This will result in a secure connection of the elements.
It is not recommended to use any other methods for assembling the chair. The product is ready for use; the remaining step is to test how well the work was done.
Quality Check
Testing the suitability of the computer chair for operation is straightforward through simple procedures. The reliability of the lifting mechanism is the first aspect to consider. During testing, sit in the chair and press the handle of the seat height adjustment mechanism (plate) – under the pressure of your body weight, the seat will begin to lower.
When the desired level is reached, release the handle. If you pull it upward and rise from the seat, the chair will return to its initial position. The quiet and stable operation of the lifting mechanism is the second condition indicating successful assembly. Lastly, lubricate the fastening elements and connection points of the components with machine oil.
Conclusion
This article provided a comprehensive overview of the gaming chair assembly process, covering the installation of casters into the base, the fitting of the gas spring, and the assembly of all components. It’s important to adhere to the manufacturer’s instructions, follow each step diligently, and ensure proper positioning and attachment of parts.
Correct assembly not only ensures the durability and reliability of the structure but also enhances comfort during extended periods of use.
Regular inspection and maintenance of the lifting mechanism, along with lubrication of fasteners, contribute to maintaining the chair’s operational quality and safety. Now, by following the outlined steps and recommendations, you are well-prepared to enjoy gaming sessions with comfort and assurance.

Hello! My name is Maximus Blaze, my friends call me BlazeGamer, and I am an experienced gamer.
I try to be objective and honest in my recommendations, and I hope my articles will help you make the right choice when choosing gaming products. Thank you for your attention, and happy reading!

